There are many reasons companies and individuals have for investing so much in data backup and recovery. Information is always very important to every business and having a system that enables you to retrieve data after it has been lost or mistakenly deleted is a huge relief. For this purpose, backup and recovery refer to a system of storing copies of data and restoring them to their original location after the initial copy (the primary data) has been lost.
When it comes to data backup and recovery on the Linux platform, there are truly quite a number of ways to go about backing up data on . Some may include cloud backups, the use of RAID technology, or a basic scheduled local backup of data on a localized disk. Regardless of the preferred option, a backup is essential to the operations of any business entity.
For most Linux users, it only makes sense that the RAID backup system is effectively utilized to backup data. Hence, to efficiently use a Linux server, you must understand how the RAID backup functions and works
RAID Backup.
RAID stands for Redundant Array of Inexpensive Disks or Redundant Array of Independent Drives. A RAID system always has at least 2 drives working individually and simultaneously. The raid is set up to create a fail-proof system where data is better optimized and data security is ensured, thanks to a concurrent backup system. RAID achieves this by storing data on many drives.
There is a hardware RAID and the software RAID. While the former requires dedicated hardware to backup data as the name implies, the later can backup data without any additional hardware. The hardware RAID is more expensive than the software RAID for obvious reasons; the hardware RAID ensures higher productivity and performance than the software. Many interfaces like the fiber channel, IDE, SCSI, SATA, etc work well with RAID systems.
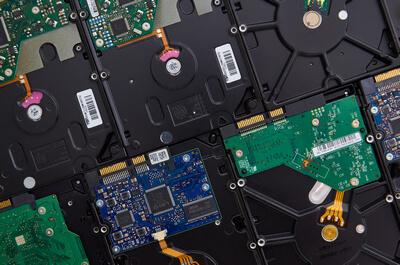
For a RAID, you must have the right components to use, and one of such components are disks which are the major component(s) needed for data storage.
Choosing the Disks That Make the Array
Creating the RAID array is very crucial as there are many RAID devices to choose from and one must select the right kind of disks. Having the wrong choice of disks may be the first point of weakness that might later lead to data compromise.
When it comes to making a choice of disks, there are basically two options: the consumer-grade drives and the server-grade drives.
Now, we have earlier mentioned that RAID is a cheap option. What we meant by that was this, the implementation of RAID won’t cost you a limb. Nevertheless, you are expected to have some considerably large buying power to support your thirst for a functional data backup solution. Anything worth something has to inevitably cost something. This may be that singular point where you might have to make some costly sacrifices.
When it comes to the disks, it is strictly advised that you avoid the consumer-grade drives by any means possible. This may be attributed to the fact that these are made without the considerations of server operations in mind. Hence, it is advised that you go all out and get the server-grade drives instead.
While the server-grade drives might take a toll on your finances initially, they tend to be a cheaper alternative, in the long run, better still, they ensure to keep data losses to the barest minimum in terms of downtime, etc. In the long run, the server-grade drives provide more value for your money than the consumer-grade drives.
The reason is pretty simple. The consumer consumer-grade drives were not designed for the kind of job you are purchasing them for, which in many cases involve continuous operations for extended periods of time.
As a result of this, there is a high likelihood of disk failure and data loss. And even in the event that you do not lose data, there are a lot of other repercussions and inconveniences that could have been avoided. This is the reason why you must not even consider the low graders for your data.
Go for the server-grade drives instead. They can go the long haul without any such complications. They are built to stay awake all their lives. Get them for your data, and you would be certainly making the right choice.
Choosing the RAID Level.
When it comes to choosing the RAID level, a lot of considerations have to be made. The reason you are creating a RAID in the first place is to have a good data backup and recovery system for your data. That’s the plan from the onset. So if this is what we want to achieve, it would be advisable to go for a RAID level that is totally fail-proof. If you want to consider the options available to you, you can read our article on RAID here.
But based on expert advice, we would rather you just go for RAID 6 and above to ensure efficient data backup and operations. If possible, just get a RAID 10. The reasons are because these types ensure the kind of efficiency, redundancy, and security you need with your data and server.
The RAID 10, for example, is a hybrid of RAID1 and 0. This makes it the sure bet for both redundancy and performance. But anything from RAID 6 should fare well enough. Note, however, that while the RAID 10 offers you quality data protection services, such data protection comes at the expense of storage space and you also have to put this into consideration when choosing the RAID level best suited for your needs.
Below is a short note on some of the different RAID levels to help you understand better:
- RAID LEVEL 0: The RAID level 0 system ensures performance by using multiple disks at the same time and improves on such performance by making use of many more controllers.
ADVANTAGES of RAID LEVEL 0:
The RAID level 0 is easy to use, performs well and ensures that all storage is used up and so, there is no overhead.
DISADVANTAGES OF RAID LEVEL 0:
It has very low data backup and storage
RAID LEVEL 0 is best suited for users who don’t need much storage space or who don’t have vital information to store.
- RAID LEVEL 1: RAID level 1 seems like an improvement on RAID level 0 because it developed a two-way data storage system whereby data is stored both in the data drives or the mirror drives. This means that if one of the drives fails, the data is recovered from the other drive, nothing is lost, and operations can continue as usual.
ADVANTAGES OF RAID LEVEL 1:
RAID level 1 utilizes a simple technological system that ensures speed and data recovery.
DISADVANTAGES OF RAID LEVEL 1:
Because the RAID LEVEL 1 store data twice, much of the storage space that should be utilized storing fresh data is instead used to store data that has already been stored in another drive.
RAID level 2 is ideal for small servers handling vital information.
- RAID LEVEL 5: RAID level 5 is a very secure RAID level and can work with up to 16 drives. It has the ability to experience a single drive failure without losing important data.
ADVANTAGES OF RAID LEVEL 5:
This Raid level is an improvement on other RAID levels below it and reads data transactions very fast. Secondly, users don’t have any reason to be afraid when a single disk failure occurs because the storage controller has the ability to restore the data on a new drive.
DISADVANTAGES OF RAID LEVEL 5:
The major disadvantage of this level is its complex technology. Data is only secure if only one disk fails at a time. If more than one disk fails at the same time, data is lost permanently.
RAID level 5 is best for servers that don’t have a lot of data drives.
- RAID LEVEL 6: There is no much difference between RAID level 6 and RAID level 5 except that with level 6 data can still be retrieved even when two disks fail at the same time. This makes it more secure than level 5.
ADVANTAGES OF RAID LEVEL 6:
RAID level 6 is more secure than the levels below it and also reads data transactions with speed.
DISADVANTAGES OF RAID LEVEL 6:
It writes data transactions are very slow, even slower than that of RAID level 5. It makes use of complex technology too.
- RAID LEVEL 10: This RAID level is a hybrid RAID configuration and is a combination of RAID levels 0 and 1. The major advantage of this level is that it rebuilds lost data way faster than other levels but has low storage capabilities.
How to Set Up RAID.
For this article, we would be using RAID 10 as our example. We would show how you can create a Linux RAID 10 array in very simple steps. If you follow the order, you can’t go wrong.
Creating a Linux RAID 10 array*
To create a RAID 10 array,
- First, list the disks which are all available for creating RAID 10.
“# ls -l /dev | grep sd”
- Partition the 4 disks using the ‘fdisk’ command.
“# fdisk /dev/sdb”
“# fdisk /dev/sdc”
“# fdisk /dev/sdd”
“# fdisk /dev/sde”
- Examine the disks for any existing raid blocks. This should be done after partitioning the disks.
“# mdadm –examine /dev/sd[b-e]”
“# mdadm –examine /dev/sd[b-e]1”
- First, create 2 sets of RAID 1 using 4 disks ‘sdb1’ and ‘sdc1’ and another set using ‘sdd1’ & ‘sde1’.
“# mdadm –create /dev/md1 –metadata=1.2 –level=1 –raid-devices=2 /dev/sd[b-c]1”
“# mdadm –create /dev/md2 –metadata=1.2 –level=1 –raid-devices=2 /dev/sd[d-e]1”
“# cat /proc/mdstat”
- Now, you can create the RAID 0 using md1 and md2 devices.
“# mdadm –create /dev/md0 –level=0 –raid-devices=2 /dev/md1 /dev/md2”
“# cat /proc/mdstat”
- Now, we save the configuration under ‘/etc/mdadm.conf‘ to load all raid devices at every reboot.
“# mdadm –detail –scan –verbose >> /etc/mdadm.conf”
Troubleshooting
Troubleshooting in computer language refers to the processes involved in identifying and fixing a computer malfunction. Troubleshooting connotes that there’s a problem either with the hardware, the software, or both and that the cause of the malfunction should be identified and fixed before the computer system begins to function optimally again.
One useful tip with troubleshooting is to first think and check for general problems that are most likely to have caused the problem before moving gradually to less common ones.
When it comes to troubleshooting, one of the major challenges you would ever face would be a disk failure. When this happens, it is important that you don’t panic because panicking would drive you into performing some actions that would further compound the problem. Instead of panicking, just go straight to your mdadm cheat sheet. That’s what everybody does. You should get a lot of help there.
In the case of a failed disk, you would want to remove the failed disk, shut down the machine and replace the disk with a new server-grade (not low grade) disk. Then you can add the new disk to the array once you have created the necessary partitions.
Recovery Methods
While there exist a number of reasons why data losses occur on a RAID 10 array, here are some of the most common causes of data loss.
The array disk failed.
An array disk or disks contained corrupted sectors.
The power supply failed.
The RAID controller is corrupted.
The rebuild failed.
The data on the disk is corrupted.
You accidentally deleted the data from an array.
If you notice any of these failures, ensure to avoid writing new data to the disk as this will drastically reduce the chances of full data recovery.
Compression and Archiving
RAID 10 offers ample compression and archiving features to ensure that data can be stored more efficiently, and easily called upon. These are especially necessary for servers which may require large user files that need to be compressed steadily in a bid to justify the expenses such as storage space, and air conditioning associated with server procurement. Thus compression and archiving remain an integral need in RAID setups generally.
Conclusions
There you have it. You can have the peace and safety you’ve always desired for your data and server. All you have to do is get a RAID. But keep in mind that the RAID is not an alternative to a concurrent backup and you would still need to back up the data from the RAID system.